# 准备工作
# 学习网站
LearnOpenGL CN: https://learnopengl-cn.github.io/
# 依赖开源项目
- Assimp:https://github.com/assimp/assimp (注:这个需要编译,后续会说,直接下载源文件不管用)
下载 Assimp: http://assimp.org/index.php/downloads
- GLFW: https://github.com/glfw/glfw (注:这个因为需要 lib 文件,所以需要官网下载相应的库文件等)
下载 GLFW: https://www.glfw.org/download.html
GLM: https://github.com/g-truc/glm
STB: https://github.com/nothings/stb (注:其实只用到一个关键文件
stb_image.h,直接手动添加头文件也可)GLAD 下载: https://glad.dav1d.de/
# IDE
Visual Studio 16 2019 (VS 2019)
(注:一定要选定好统一的调试模式,例如 Debug 模式 /x64,后续的 Assimp 编译模式也要与此统一:Debug 模式 /x64,以及 GLFW 的相应文件下载也是 x64 的)
另外,本人习惯:所有后续的 include 文件 (.h 包含目录)、lib 文件 (.lib 库目录) 都是使用的 VS 2019 默认的目录,应该是
Microsoft Visual Studio(VS2019安装目录)\2019\Community\VC\Tools\MSVC\14.28.29910里面的include文件夹和lib文件夹,查看方法:打开菜单 -> 项目 ->(项目)属性 ->VC ++ 目录 -> 包含目录 -> 编辑,在下方计算的值即可看到目录位置;也可以自定义相应的目录,在上述位置中修改添加等。
# 软件
Cmake: https://cmake.org/download/
需要 cmake 对 assimp 进行编译
当快捷键
win+R输入cmd,输入cmake --help显示
类似如上,即成功
# 正式开始
# 1、新建项目
打开 VS 2019,新建一个普通的控制台项目即可;
以下以 LearnOpenGL CN 上项目为例:
打开 https://learnopengl.com/code_viewer_gh.php?code=src/3.model_loading/1.model_loading/model_loading.cpp
将源码复制到对应工程的源文件中,此时会有很多报错,不要急,因为缺少相应的头文件等
# 2、配置导入头文件(重要)
# (1) GLAD
打开网站:https://glad.dav1d.de/,在 API 里选择对应的 opengl 版本下载即可,本项目以 opengl 版本为 4.1 为例,最后点击下方的 Generate 下载;
下载 glad.zip ,解压后找到 glad/src 下的 glad.c ,添加到项目 -> 源文件中,找到 glad/include/glad 文件夹,将其复制到 VS 2019 对应的包含目录中(开头已经说明)。
# (2) GLFW
打开网站:https://www.glfw.org/download.html,我是 Windows 平台,64 位,所以点击 64-bit Windows binaries 下载,解压后打开 lib-vc2019 ,将里面的 lib 文件复制到 VS 2019 对应的库目录 x64 文件夹中;
接下来,打开菜单 -> 项目 -> 属性,找见链接器 -> 输入 -> 附加依赖项 -> 编辑,输入 glfw3.lib ,确定;
下载 https://github.com/glfw/glfw/tree/master/include 里的 GLFW 文件夹,解压后复制 GLFW 文件夹至 VS 2019 对应的包含目录中。
# (3) GLM
下载 https://github.com/g-truc/glm,复制里面的 glm 文件夹至 VS 2019 对应的包含目录中即可。
# (4) LearnOpenGL 头文件问题
打开 https://learnopengl.com/code_viewer_gh.php?code=src/3.model_loading/1.model_loading/model_loading.cpp
鼠标移动至 #include <learnopengl/shader_m.h> 中,点击,即可跳转至 shader_m.h 文件,在项目中头文件右键,添加新建项,命名为 shader_m.h,复制代码至文件中;
后续的 camera.h 和 model.h 添加方法相同,都是新建头文件,复制代码进去;对用网站地址:
shader_m.h: https://learnopengl.com/code_viewer_gh.php?code=includes/learnopengl/shader.h
camera.h: https://learnopengl.com/code_viewer_gh.php?code=includes/learnopengl/camera.h
model.h: https://learnopengl.com/code_viewer_gh.php?code=includes/learnopengl/model.h
然后,将头文件由(例) #include <learnopengl/shader_m.h> 改成 #include "shader_m.h" ,后面的 camera.h 和 model.h 相同
# (5) model.h 头文件问题
此时 shader_m.h 文件和 camera.h 文件都没有错误,但 model.h 文件还需要配置一些头文件,包括 stb_image.h 文件、assimp 库、mesh.h 和 shader.h,下面先说明 mesh.h 和 shader.h
和 (4) 一样,都是新建头文件,复制对应的代码进去;对用网站地址:
mesh.h: https://learnopengl.com/code_viewer_gh.php?code=includes/learnopengl/mesh.h
shader.h: https://learnopengl.com/code_viewer_gh.php?code=includes/learnopengl/shader.h
然后,将头文件由(例) #include <learnopengl/mesh.h> 改成 #include "mesh.h" ,后面的 shader.h 相同
注:mesh.h 中也引入了 shader.h,也需要改一下
# (6) stb_image.h 头文件问题
项目头文件新建.h 文件命名为 stb_image.h
LearnOpenGL 网站地址如下:https://learnopengl-cn.github.io/01 Getting started/06 Textures/#stb_imageh,可作为了解参考
代码地址:https://github.com/nothings/stb/blob/master/stb_image.h,复制代码至新建的头文件中,即可,头文件改成 #include "stb_image.h"
重要⭐⭐⭐:这时直接引用会报错,代码 stb_image.h 里有如下说明:
Do this: | |
#define STB_IMAGE_IMPLEMENTATION | |
before you include this file in *one* C or C++ file to create the implementation. |
因此,要在 #include "stb_image.h" 引用前加一行,如下:
#define STB_IMAGE_IMPLEMENTATION | |
#include "stb_image.h" |
# (7) assimp 库(核心)
下载 Assimp: http://assimp.org/index.php/downloads,选择 Get the sourcecode 或者直接访问 https://github.com/assimp/assimp/releases/tag/v5.0.1 下载 Source code (zip) (以这个 5.0.1 版本为例)
解压 assimp-5.0.1,新建文件夹 build,按住 Shift 键,右键,选择 在此处打开Powershell窗口 ,输入以下命令:
cmake .. -G "Visual Studio 16 2019" |
回车键,如图生成以下文件即成功:
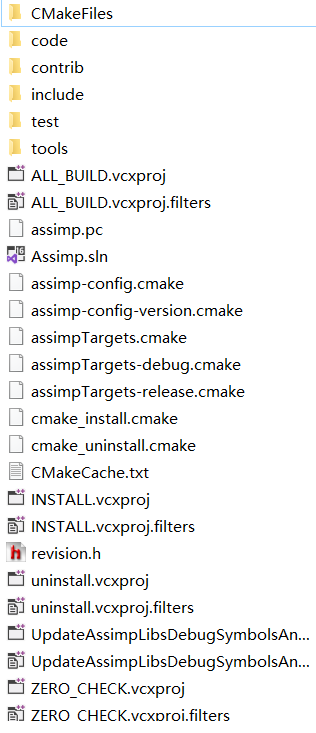
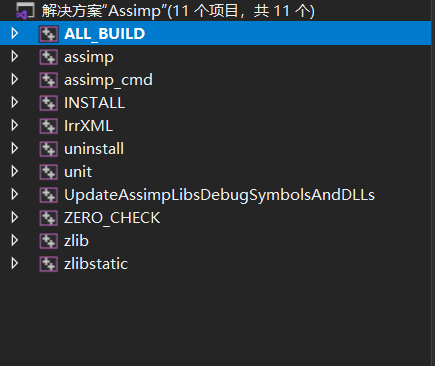
打开.sln(Solution 文件), 注意编译环境是 Debug /x64,选择 ALL_BUILD,生成
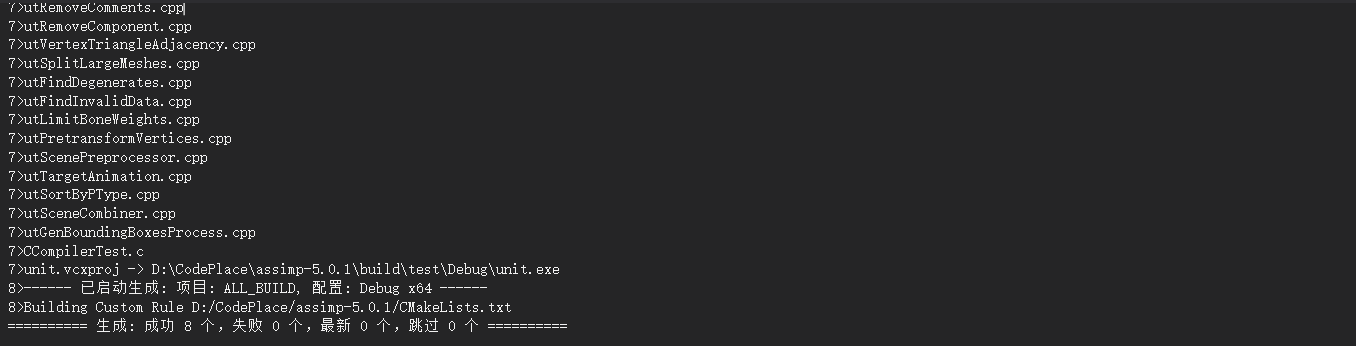
等待生成成功,输出窗口出现以下即为成功:
复制 assimp-5.0.1\build\include\assimp 文件夹下的 config.h 到 assimp-5.0.1\include\assimp 文件夹里
复制下载的 assimp-5.0.1\include 文件夹里的 assimp 文件夹至 VS 2019 对应的包含目录中。
复制 assimp-5.0.1\build\code\Debug 里的除.dll 文件到 VS 2019 对应的库目录 x64 文件夹中。
注意:此时运行可能会出现如下问题:
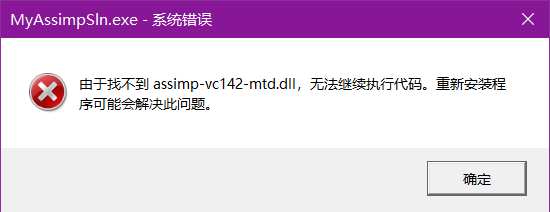
解决方法:
将 assimp-5.0.1\build\code\Debug 里的 assimp-vc142-mtd.dll 复制到 项目文件夹/x64/Debug 文件夹下
,或者复制到系统的 C:/Windows/System32 文件夹下(因为是 x64 下)
接下来,打开菜单 -> 项目 -> 属性,找见链接器 -> 输入 -> 附加依赖项 -> 编辑,输入 assimp-vc142-mtd.dll ,确定;
# (8) 模型问题
打开主函数文件,大概在 80 行代码处有以下代码
// build and compile shaders | |
// ------------------------- | |
Shader ourShader("1.model_loading.vs", "1.model_loading.fs"); | |
// load models | |
// ----------- | |
Model ourModel(FileSystem::getPath("resources/objects/backpack/backpack.obj")); |
其中 1.model_loading.vs 和 1.model_loading.fs 都是 shader 文件, backpack.obj 是 OBJ 格式的模型文件
接下来,先搞定 shader 文件,分别在项目源文件新建文件,分别命名为 1.model_loading.vs 和 1.model_loading.fs ,
访问网站,粘贴代码,网站和代码如下:
1.model_loading.vs
#version 330 core | |
layout (location = 0) in vec3 aPos; | |
layout (location = 1) in vec3 aNormal; | |
layout (location = 2) in vec2 aTexCoords; | |
out vec2 TexCoords; | |
uniform mat4 model; | |
uniform mat4 view; | |
uniform mat4 projection; | |
void main() | |
{ | |
TexCoords = aTexCoords; | |
gl_Position = projection * view * model * vec4(aPos, 1.0); | |
} |
1.model_loading.fs
#version 330 core | |
out vec4 FragColor; | |
in vec2 TexCoords; | |
uniform sampler2D texture_diffuse1; | |
void main() | |
{ | |
FragColor = texture(texture_diffuse1, TexCoords); | |
} |
接下来搞定 obj 模型文件,按照 resources/objects/backpack/backpack.obj 新建文件夹也可,自己定义路径也可,我放在与.sln 同一级文件夹下新建的 resources/objects/backpack 目录下,即 ../resources/objects/backpack/
下载模型 nanosuit.rar: https://learnopengl-cn.github.io/data/nanosuit.rar
然后解压,复制所以文件至 ../resources/objects/backpack/ 下,对于我这种代码改成
// load models | |
// ----------- | |
Model ourModel(FileSystem::getPath("../resources/objects/backpack/nanosuit.obj")); |
最后,上方代码会报错,是关于 FileSystem 相关的,改成如下就正确了
// build and compile shaders | |
// ------------------------- | |
Shader ourShader("1.model_loading.vs", "1.model_loading.fs"); | |
// load models | |
// ----------- | |
Model ourModel("../resources/objects/backpack/nanosuit.obj"); |
# 最终成果
运行如下:
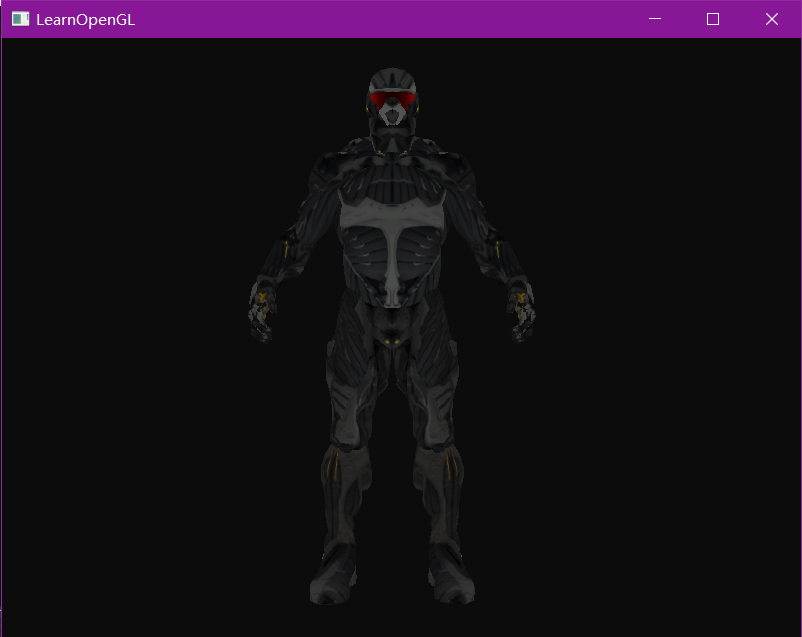
成功!